RV Winterization Inside and Out!
It’s that time of year where all the campgrounds are saying “See you next year” to their seasonal guests and watching as they prep their RV’s and seasonal units for a winter’s rest. The snowy season can really wreak havoc on your home away from home if you don’t take proper care. Here are some tips to winterize your RV inside/out. Some are more extreme than necessary that I picked up from serious RV’ers who use their unit for more road travel, but I will say, why not spend a little more time and very little money to protect something you and your family invested in? Also, just because you don’t have cold seasons where you RV or store your RV, doesn’t mean you shouldn’t look at some of the steps below! Annual maintenance in general really adds years of life to your RV.
Inside Your RV
Some areas really struggle with stink bugs or Asian beetles – I know we do! Spring comes and the RV is full of the little guys who have found curtains and bedding for their winter home. Enter vacuum cleaners and that not-so-lovely scent come Spring – oy! To avoid that chore as much as possible, put away, wrap up, and store as many items as possible, giving those little guys less space to burrow down. Side tip: that will also help you avoid any rodent nests as well!
- All blankets and pillows are stored in plastic bins, either in the camper or in your basement, storage shed…you get the idea.
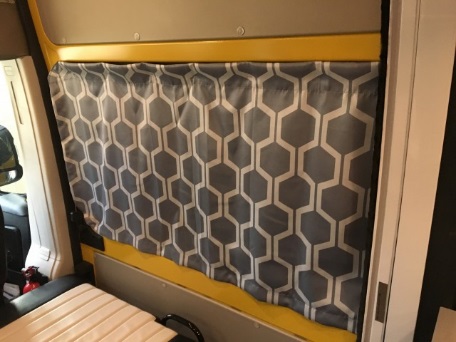
- Remove any curtains you can – don’t worry, you aren’t changing in there now anyway.😊
- Some curtains are affixed/semi-permanent and for those, just keep them open as much as possible, leaving as few folds as possible for bugs to hide or crawl into the “warm” creases.
- We store others, like the kids’ bunk curtains, in plastic bins.
The foam pad for our mattress we roll and put into large garbage bags, taping them off so the bugs can’t crawl in. Just be sure to store those lying on their long side, not the short end. Foam mattresses aren’t designed to hold their weight on that end!
- Bring the bunk mattresses into the house and store them under or behind a bed. If you don’t have room in your house for this, you could also bag/tape these as well and leave them in the camper!
- Leftover food is not always a good thing. When packing up for the winter, make sure that anything you leave behind isn’t a food source for someone you don’t want to snuggle with come spring!
- Be sure to remove all food from the pantry and vacuum up any remaining crumbs. Don’t forget the silverware drawer that seems to always wind up dirty, just holding the clean utensils! (insert eye roll here)
- Empty the refrigerator and freezer, sanitizing both with any kitchen cleaner. We keep baking soda and a container of charcoal briquets in the unit to keep moisture out. Don’t forget to leave the doors slightly open to allow air to circulate. Forgot about this one year and we came back to a significant science project growing.
- Thankfully, we haven’t had a consistent rodent issue, but putting moth balls in the camper in the nooks/crannies can help keep them at bay. To see more tips on keeping mice/rodents out – check out our previous blog!
Outside your RV
Now let’s look at what steps you should take to keep the mechanics and outside of your RV safe through winter months. If not properly drained, water can get inside your RV pipes, the water expands is it gets close to freezing, and eventually BOOM!
I love this little checklist from Sanidumps.com, with simple steps on how to winterize your RV water system for winter or long periods of storage. One thing to highlight here: Even if you store your RV in a warmer climate, you should still follow some of the steps below. Its not good for your system to sit unused for long periods of time! Also, be sure to have your owner’s manual ready and double check any of the steps below to that. Every unit is different and may have unique care steps.
Draining the Water
First, you need to open the fresh water tank valve, letting all the water drain from the holding tank. While that water is draining, if at all possible, try to bypass your hot water heater. Knowing if you can bypass the hot water heater could save you GALLONS/LITRES of antifreeze!
- Make sure your water pump is turned to the “off” position. (Don’t feel bad, we’ve all forgotten this step before and learned the hard way!)
- Open any sink faucet to relieve the water pressure for both the hot and cold lines.
- Open the hot water tank drain plug and drain the hot water tank.
- If your RV has a low point drain for water lines (some don’t have these – check your manual!) open those to drain the water lines. A few tips/areas to check for your low point drains include:
- low point drain for cold water only
- low point drain for hot and cold-water lines (usually located under the RV but could be located in the floor, or an RV compartment)
- an RV with two low point drains for both hot and cold-water lines (located on the driver side front and passenger side rear of the RV)
- Some RVs have NO low point drains
- Open/run all the cold and hot water faucets in the entire RV – and I mean ALL. Sinks, shower/bath, toilet, fridge (you may have an ice maker?), laundry, outside shower – whatever your unit has, open it up! Flush your toilets a few times just to make sure all the water has run out.
This next step is optional:
 Get your air compressor ready and attach your air adaptor to the RV’s water lines. This can be purchased at most hardware/RV stores and is commonly known as a “blowout plug.” Use a max 15 psi to get water out, but to ensure you don’t damage shower heads, etc. This step isn’t 100% necessary, but it just ensures that your antifreeze isn’t diluted, which can protect your RV even more! If you do this step, be sure to disconnect air adaptor from the RV and compressor now.
Replace caps on all the drains and shut off/close all the cold and hot water faucets that you opened up earlier, including your fresh water tank valve.
Drain the black and gray holding tanks in your unit next – those should be flushed in this step as well! If you are unsure on that process, check out another handy link from Sandidumps here.
Next Up – Antifreeze for Cold Climates 
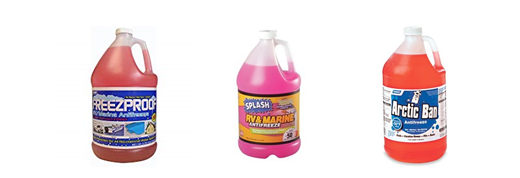
There are a ton of different brands of RV antifreeze and from what I’ve gathered, its really all down to preference on price and quality, but in the end, they are all antifreeze. (I’m sure Antifreeze manufacturers would disagree with me here. 😊) Here are just some examples:
- Choose your brand of antifreeze and then choose your method of how to add it to your RV – I know lotta’ choices! You can add antifreeze one of three ways:
- using a water pump conversion kit (preferred method and what we’ll go through below for an example below)
- outside with a hand pump
- using your fresh water tank (least preferred method)
- Place the water line end of the water pump conversion kit in a jug of pink RV antifreeze. If you have a bypass installed (to avoid filling your water heater), you’ll only need about 2-3 gallons of antifreeze. Unfortunately, without a bypass, you’ll need enough to fill the entire tank – that could be 6-10 gallons more!
- Turn on the fresh water pump and that will pull the antifreeze from the job to the RV plumbing system.
- In general, you want to work from one end of your RV unit to the other – so start at the kitchen sink for example, turn on the hot faucet and run it until it turns solid pink. That means it is filled with antifreeze. Do the same with the cold water. Head to the next water outlet and do the same. Note that you may have to flush the toilet several times until you see a strong shade of pink!
- Pour about 3 cups of antifreeze into the toilet, and in EACH drain – that includes the washing machine, ice maker and any other additional drains you have! Here’s another good time to check that manual to make sure you didn’t miss anything.
- Remove the water line from the antifreeze jug and reconnect that to the fresh water take – if you had to disconnect the water line.
- Final step – check the label on your antifreeze and wipe out the bath tub/shower/sinks if it says to do so. Some brands recommend this step, others don’t – check to be sure!
Before you shop around for antifreeze and a water pump conversion kit, do your research! There are some complete kits like this one that include almost everything you need, depending on your model. Something like this may be cheaper, depending on what you already have on hand. Again, this is just a preference!
Check the Perimeter
When you walk around your RV, think of all the areas that rodents, or UV light, could damage while your unit sits. If you store inside, this may be less of a problem – just things to think about!
- Vents/Holes – all should be covered! You probably already have some mesh guards in place, but if you don’t know is the time. Think roof, pipes, vents, and seams – keeping out birds, bugs, and rodents.
- RV Wheel Covers and RV Covers:
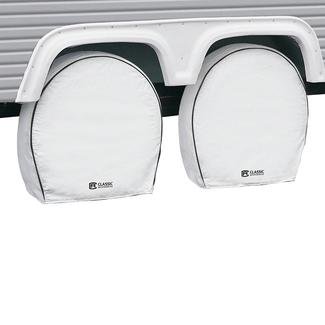
 Tire covers can be specific to your wheel, protecting them from sun damage, or you can use something as simple as plywood – here are some examples of both options. This is a highly debated step, as you can see here – to cover or not to cover. Your question to answer haha! Same goes for your RV itself. You don’t want snow/rodents getting in…but no one is loving mold/mildew as the alternative. If you DO opt to cover the entire RV, be sure its with a material that breathes!
- Let your RV Breathe! Leave one vent slightly open (with mesh in place), or install dehumidifier crystals.
- Fully charge the batteries. Charging either regularly or removing the battery, storing it elsewhere and keeping it on a trickle charger seems to be the least time-consuming solution.